Compile StoneDB for MySQL5.6 on Ubuntu 20.04
This topic describes how to compile StoneDB for MySQL5.6 on Ubuntu 20.04.
Precautions
Ensure that the tools and third-party libraries used in your environment meet the following version requirements:
- GCC 9.4.0
- Make 3.82 or later
- CMake 3.7.2 or later
- marisa 0.77
- RocksDB 6.12.6
- Boost 1.66
Procedure
Step 1. Install the dependencies
sudo apt install -y gcc
sudo apt install -y g++
sudo apt install -y make
sudo apt install -y cmake
sudo apt install -y build-essential
sudo apt install -y autoconf
sudo apt install -y tree
sudo apt install -y bison
sudo apt install -y git
sudo apt install -y libtool
sudo apt install -y numactl
sudo apt install -y python3-dev
sudo apt install -y openssl
sudo apt install -y perl
sudo apt install -y binutils
sudo apt install -y libgmp-dev
sudo apt install -y libmpfr-dev
sudo apt install -y libmpc-dev
sudo apt install -y libisl-dev
sudo apt install -y zlib1g-dev
sudo apt install -y liblz4-dev
sudo apt install -y libbz2-dev
sudo apt install -y libzstd-dev
sudo apt install -y zstd
sudo apt install -y lz4
sudo apt install -y ncurses-dev
sudo apt install -y libsnappy-dev
sudo apt install -y libedit-dev
sudo apt install -y libaio-dev
sudo apt install -y libncurses5-dev
sudo apt install -y libreadline-dev
sudo apt install -y libpam0g-dev
sudo apt install -y libicu-dev
sudo apt install -y libboost-dev
sudo apt install -y libgflags-dev
sudo apt install -y libjemalloc-dev
sudo apt install -y libssl-dev
sudo apt install -y pkg-config
Ensure that all the dependencies are installed. Otherwise, a large number of errors will be reported.
Step 2. Install third-party dependencies
Ensure that the CMake version in your environment is 3.7.2 or later and the Make version is 3.82 or later. Otherwise, install CMake, Make, or both of them of the correct versions.
StoneDB is dependent on marisa, RocksDB, and Boost. You are advised to specify paths for saving the these libraries when you install them, instead of using the default paths.
- Install CMake.
wget https://cmake.org/files/v3.7/cmake-3.7.2.tar.gz
tar -zxvf cmake-3.7.2.tar.gz
cd cmake-3.7.2
./bootstrap && make && make install
/usr/local/bin/cmake --version
apt remove cmake -y
ln -s /usr/local/bin/cmake /usr/bin/
cmake --version
- Install Make.
wget http://mirrors.ustc.edu.cn/gnu/make/make-3.82.tar.gz
tar -zxvf make-3.82.tar.gz
cd make-3.82
./configure  --prefix=/usr/local/make
make && make install
rm -rf /usr/local/bin/make
ln -s /usr/local/make/bin/make /usr/local/bin/make
make --version
- Install marisa.
git clone https://github.com/s-yata/marisa-trie.git
cd marisa-trie
autoreconf -i
./configure --enable-native-code --prefix=/usr/local/stonedb-marisa
sudo make && make install
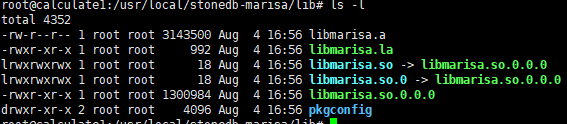
The installation directory of marisa in the example is** /usr/local/stonedb-marisa**. You can change it based on your actual conditions. In this step, the following directories and files are generated in /usr/local/stonedb-marisa/lib.
- Install RocksDB.
wget https://github.com/facebook/rocksdb/archive/refs/tags/v6.12.6.tar.gz
tar -zxvf v6.12.6.tar.gz
cd rocksdb-6.12.6

sudo cmake ./ \
  -DCMAKE_BUILD_TYPE=Release \
  -DCMAKE_INSTALL_PREFIX=/usr/local/stonedb-gcc-rocksdb \
  -DCMAKE_INSTALL_LIBDIR=/usr/local/stonedb-gcc-rocksdb \
  -DWITH_JEMALLOC=ON \
  -DWITH_SNAPPY=ON \
  -DWITH_LZ4=ON \
  -DWITH_ZLIB=ON \
  -DWITH_ZSTD=ON \
  -DUSE_RTTI=ON \
  -DROCKSDB_BUILD_SHARED=ON \
  -DWITH_GFLAGS=OFF \
  -DWITH_TOOLS=OFF \
  -DWITH_BENCHMARK_TOOLS=OFF \
  -DWITH_CORE_TOOLS=OFF

sudo make -j`nproc`
sudo make install -j`nproc`
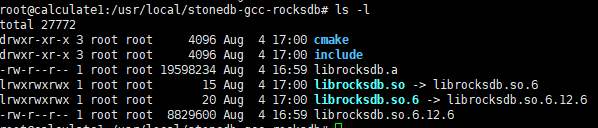
The installation directory of RocksDB in the example is /usr/local/stonedb-gcc-rocksdb. You can change it based on your actual conditions. In this step, the following directories and files are generated in /usr/local/stonedb-gcc-rocksdb.
- Install Boost.
wget https://sourceforge.net/projects/boost/files/boost/1.66.0/boost_1_66_0.tar.gz
tar -zxvf boost_1_66_0.tar.gz
cd boost_1_66_0
./bootstrap.sh --prefix=/usr/local/stonedb-boost
./b2 install --with=all
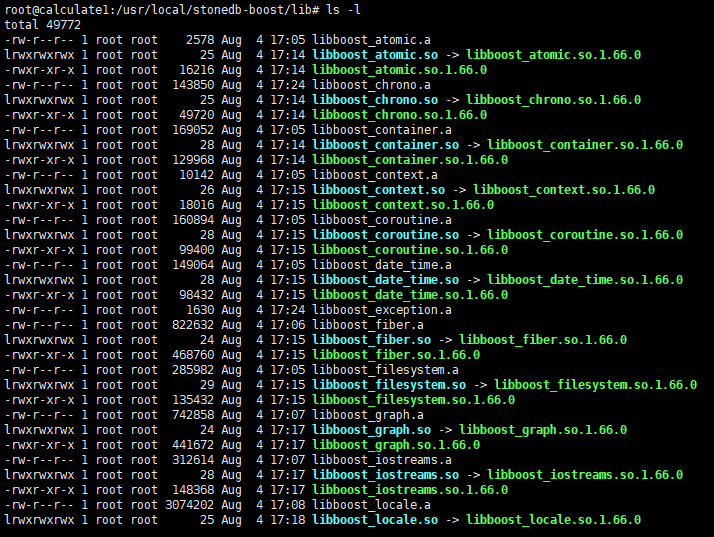
The installation directory of Boost in the example is /usr/local/stonedb-boost. You can change it based on your actual conditions. In this step, the following directories and files are generated in /usr/local/stonedb-boost/lib.
During the compilation, the occurrences of keywords warning and** failed** are normal, unless error is displayed and the CLI is automatically closed.
It takes about 25 minutes to install Boost.
Step 3. Compile StoneDB
Currently, StoneDB has two branches: StoneDB-5.6 (for MySQL 5.6) and StoneDB-5.7 (for MySQL 5.7). The link provided in this topic is to the source code package of StoneDB-5.7. In the following example, the source code package is saved to the root directory and is switched to StoneDB-5.6 for compilation.
cd /
git clone https://github.com/stoneatom/stonedb.git
cd stonedb
git checkout remotes/origin/stonedb-5.6
Before compilation, modify the compilation script as follows:
- Change the installation directory of StoneDB based on your actual conditions. In the example, /stonedb56/install is used.
- Change the installation directories of marisa, RocksDB, and Boost based on your actual conditions.
### Modify the compilation script.
cd /stonedb/scripts
vim stonedb_build.sh
...
install_target=/stonedb56/install
...
-DDOWNLOAD_BOOST=0 \
-DWITH_BOOST=/usr/local/stonedb-boost/ \
-DWITH_MARISA=/usr/local/stonedb-marisa \
-DWITH_ROCKSDB=/usr/local/stonedb-gcc-rocksdb \
2>&1 | tee -a ${build_log}

### Execute the compilation script.
sh stonedb_build.sh
If your OS is CentOS or RHEL, you must comment out os_dis and os_dist_release, and modify the setting of build_tag to exclude the os_dist and os_dist_release parts. This is because the the values of Distributor, Release, and Codename output of the lsb_release -a command are n/a. Commenting out os_dist and os_dist_release only affects the names of the log file and the TAR package and has no impact on the compilation results.
Step 4. Start StoneDB
Users can start StoneDB in two ways: manual installation and automatic installation.
- Create an account.
groupadd mysql
useradd -g mysql mysql
passwd mysql
- Manually install StoneDB.
If the installation directory after compilation is not /stonedb56, files reinstall.sh, install.sh, and my.cnf will not automatically generated. You need to manually create directories, and then initialize and start StoneDB. You also need to configure parameters in file my.cnf, including the installation directories and port.
### Create directories.
mkdir -p /data/stonedb56/install/data/innodb
mkdir -p /data/stonedb56/install/binlog
mkdir -p /data/stonedb56/install/log
mkdir -p /data/stonedb56/install/tmp
chown -R mysql:mysql /data

### Configure parameters in my.cnf.
vim /data/stonedb56/install/my.cnf
[mysqld]
port      = 3306
socket    = /data/stonedb56/install/tmp/mysql.sock
datadir   = /data/stonedb56/install/data
pid-file  = /data/stonedb56/install/data/mysqld.pid
log-error = /data/stonedb56/install/log/mysqld.log

chown -R mysql:mysql /data/stonedb56/install/my.cnf

### Initialize StoneDB.
/data/stonedb56/install/scripts/mysql_install_db --datadir=/data/stonedb56/install/data --basedir=/data/stonedb56/install --user=mysql

### Start StoneDB.
/data/stonedb56/install/bin/mysqld_safe --defaults-file=/data/stonedb56/install/my.cnf --user=mysql &
- Execute reinstall.sh to automatically install StoneDB.
If the installation directory after compilation is /stonedb56, execute reinstall.sh. Then, StoneDB will be automatically installed.
cd /stonedb56/install
./reinstall.sh
Differences between reinstall.sh and install.sh:
- reinstall.sh is the script for automatic installation. When the script is being executed, directories are created, and StoneDB is initialized and started. Therefore, do not execute the script unless for the initial startup of StoneDB. Otherwise, all directories will be deleted and StoneDB will be initialized again.
- install.sh is the script for manual installation. You can specify the installation directories based on your needs and then execute the script. Same as reinstall.sh, when the script is being executed, directories are created, and StoneDB is initialized and started. Therefore, do not execute the script unless for the initial startup. Otherwise, all directories will be deleted and StoneDB will be initialized again.
- Log in to StoneDB.
/stonedb56/install/bin/mysql -uroot -p -S /stonedb56/install/tmp/mysql.sock
Enter password:
Welcome to the MySQL monitor.  Commands end with ; or \g.
Your MySQL connection id is 2
Server version: 5.6.24-StoneDB-debug build-

Copyright (c) 2000, 2022 StoneAtom Group Holding Limited
Type 'help;' or '\h' for help. Type '\c' to clear the current input statement.

mysql> show databases;
+--------------------+
| Database           |
+--------------------+
| information_schema |
| cache              |
| innodb             |
| mysql              |
| performance_schema |
| sys_stonedb        |
| test               |
+--------------------+
7 rows in set (0.00 sec)